

An uneven floor in a lab is certainly a cause for concern. Where transporting hazardous chemicals and equipment around the lab is concerned, the unsteady footing caused by issues with the facility’s flooring can put your laboratory staff in danger.
This is where floor screed can come in useful. But if you’re unfamiliar with it, then you most likely have a question or two concerning what it is and what it does.
To help you out, we’ll look at floor screed in more detail, covering what it is, the different types of screeds, and things to keep in mind when preparing to apply screed to your laboratory’s floor.
What is screed?
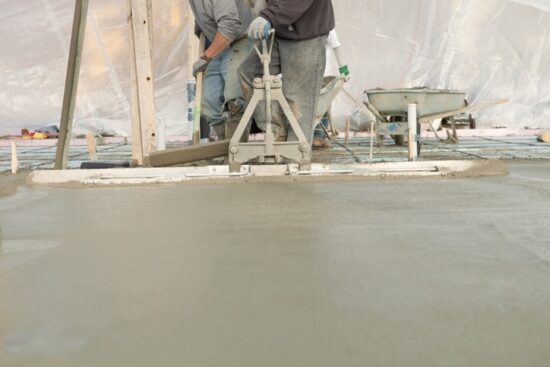
Used in a wide range of applications within construction, screed is a thin layer of non-structural material that’s similar to concrete, and is commonly applied to a concrete subfloor or over insulation. It acts as a finishing layer on internal floors to improve both appearance and durability. This thin layer can vary in thickness from around 50mm to 100mm depending on its application.
Usually, it’s made from a mix of sharp sand, cement and water, in a 1:3 or 1:4 ratio of cement to sharp sand, which produces a semi-dry consistency that can be shovelled, trowelled and levelled into place. Certain additives are also added to improve particular characteristics such as faster drying times, improved thermal conductivity for underfloor heating or increased strength.
It’s also used in the application of new flooring, especially wherever an existing lab facility’s flooring is uneven and puts staff at risk of tripping or injuring themselves.
The low cost of sand-cement screed means it’s been used for years, but its slow, manual labour-intensive application and low thermal conductivity means this variety is gradually being replaced by flowing/liquid screeds.
Flowing (or liquid screeds) are gypsum/anhydrite/calcium sulphate or cement-based screeds that flow from a pump and can be applied much faster than traditional screeds. They result in a smooth, even surface and have good thermal conductivity, and despite their high water content, they rarely crack or curl.
Different types of screed
There are three main types of screed which are used in the marketplace, which are:
- Unbonded screed: Unbonded screed sits on top of plastic sheets or another type of membrane as opposed to sitting directly onto the concrete floor or other substrates.
This layer protects the concrete floor from moisture and settling (i.e., when floor joists are set too far apart or they span too great a distance without support from beneath, causing them to settle, sag and cause the floor to slope.
- Bonded screed: This type of screed, on the other hand, involves adhesion of the screed directly to the concrete subfloor.
- Floating screed: Floating screeds are unbonded screeds that are typically laid on a layer of insulation. They are mainly used in structures with underfloor heating or wherever acoustic or thermal insulation is needed.

How to prepare a floor for screed
Before the process of screeding begins, there are number of things to take into account prior to application which we’ll run through below.
The surface of the floor the screed will be applied to should be clean and free of any debris. Concrete floors should also be wetted and brushed, as any dirt and grease can prevent the mixture from settling evenly.
Where bonded screeds are required, the floor should also be suitably prepared with cement grouting or a bonding agent so the screed can adequately adhere.
Because screeding should never take place in weather conditions that might affect the end result, damp proofing should be completed beforehand. Likewise, precautions must be taken to prevent the screed surface drying out too quickly in hot or dry weather, while screeds shouldn’t be installed in cold weather. Any screed that’s damaged by the cold should be removed and replaced.
How to apply flooring screed
Unbonded screed
- Once the floor is clean as described above, lay down polythene sheets or another form of membrane to separate the concrete flooring from the screed. Be sure to overlap the sheets by 20-30cm and then tape them to prevent leakage onto the concrete subfloor. The sheets should also run up the walls by around 10 cm.
- Run insulation, edging foam or polystyrene around the walls to prevent damage to walls when the screen shrinks in the drying process.
- If it’s needed, reinforce the screed with fibres. This strengthens the screed and prevents it from cracking when it dries. Alternatively, you can lay screed reinforcement mesh over the subfloor, which should sit in the top half of the screed once it’s been laid.
- You’re now ready to lay the screed.
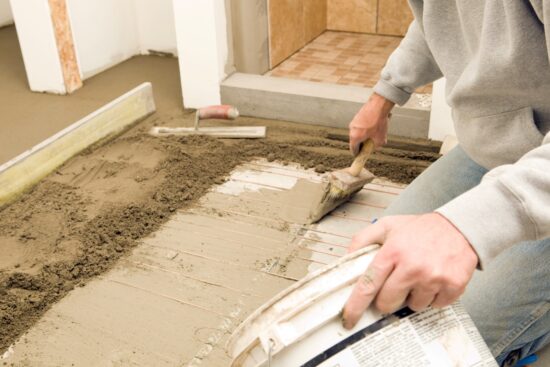
Bonded screed
- When adhering bonded screed to the concrete subfloor, you should first roughen the surface of the concrete. This exposes the concrete in the aggregate and maximises the subfloor’s adhesive potential. You can do this by using a chipping hammer, a pick or specialist equipment such as a shot blaster or floor scabbler.
- Next, sprinkle the floor with water to reduce the number of airborne particles, and use a vacuum cleaner to remove any dust and debris.
- Now you’re ready to apply your bonding agent to the concrete. A mixture of PVA glue, water and cement or styrene-butadiene rubber (SBR) tends to be a popular choice, but whichever agent you go for, always follow the manufacturer’s instructions when preparing the bonding agent.
- Once done, add the screed immediately. Do not leave it for any length of time or the screed and bonding agent will not mix. Now you’re ready to lay the screed.
If you have an upcoming construction project to complete, then the team at InterFocus can help. For more information about our bespoke fitted labs, visit our homepage or call our team on 01223 894 833.


